Wednesday, 12 May 2021

Collections - A 50 year old collection of birds eggs


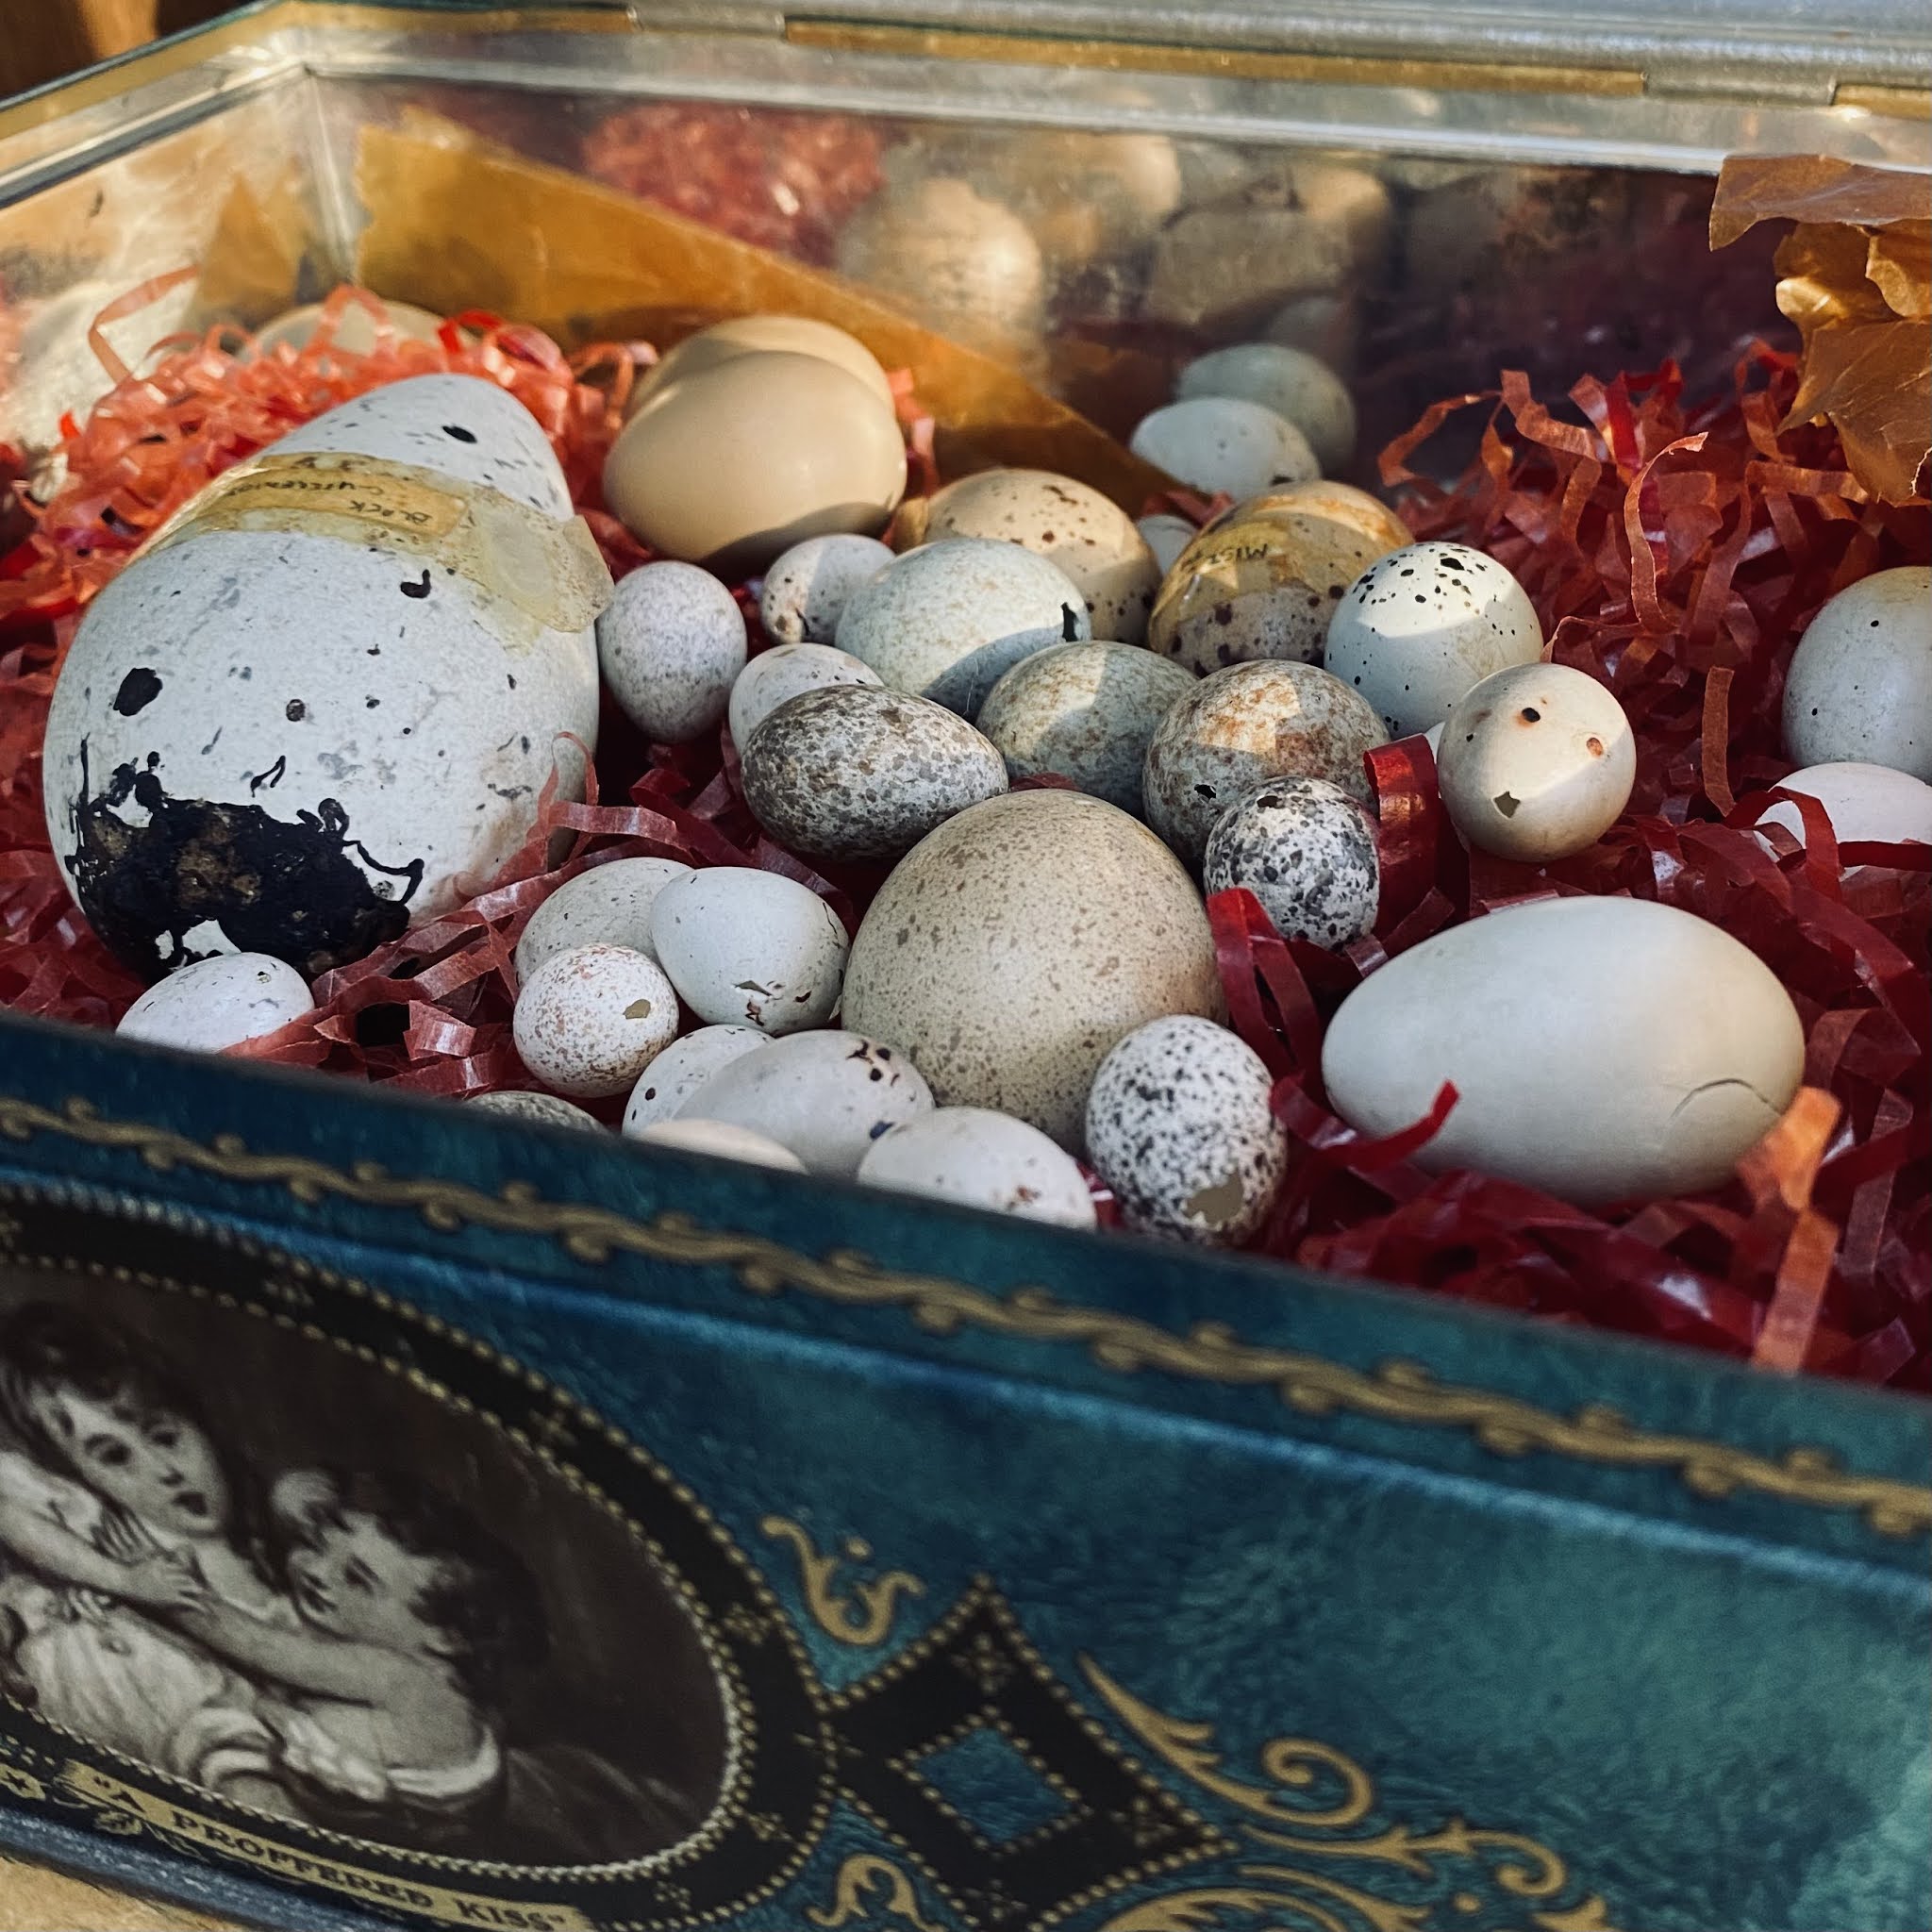
Recently a lovely old friend of ours bequeathed me his childhood egg collection housed in a gorgeous old tin. He had been an avid young scientist as a boy growing up in Europe before moving to Tasmania and knowing my fascination and love of birds and their nests he thought I would appreciate them. How right he was!

A few have old labels that he had stuck on with sticky tape - old and yellowing now, but I rather like them. Most are small blue, white, speckled or brownish eggs but there is one large Black Guillemot egg which is rather extraordinary. From a medium-sized seabird found throughout the northern Atlantic coasts it has a rather amazing dark colouration on the base of the egg which also has quite a pointed shape at the narrower end.


These eggs are incredibly fragile and so at this stage I will leave them just as they were given to me - carefully nestled into the tin box with shredded red and old burnished glassine paper until I find a more suitable storage arrangement. I think I will try to research the different kinds of eggs that are not labelled and investigate what the bird and their nests are like which will be really interesting to do. Our local museum has some wonderful old egg collections that I may be able to use for my research. Do you have any natural collections that you treasure? 


Wednesday, 6 January 2021

New Nests

We feel so lucky to have such wonderful people who support our small business by selling our nests. The latest ones have just been picked up by Julie @theblackhen who photographs them so beautifully for her online store and has been selling them for us for over five years. We also sell them through Kylie @crazybeautifulhomewares in New South Wales in her lovely bricks and mortar store. Natalie @nestonrisby in Ulverstone also has a boutique bricks and mortar store where she has a range of our small aromatherapy and botanical inspired little nests. It was in her earlier store in Penguin in 2012 that we first started selling our nests.


For these nests we have walked on the mountain and on bush tracks and have gathered all sorts of found treasures from nature to build and construct them. Of course we only collect twigs, branches, seedpods and feathers that have fallen to the ground and most of the moss and floral elements are collected from our own garden or those of friends. 


We love working with nature and the lovely people who sell our wares and of course those of you who purchase them. Thank you.


Monday, 7 December 2020

Festive Season


Are you busy getting ready for Christmas? There are always so many enjoyable things to do - organise presents, meet friends, write cards, try to catch the post in time and of course make our own homes look festive. If you are anything like us, we say every year that we must try to simplify everything next Christmas!! This year has made us all 'pause' more than usual and so in our home we are trying think carefully about what we really need to be doing to bring joy to all we know and keep our focus on the simple and really important things about Christmas. 

We have begun drying orange slices ready to string them up across our windows with pine cones and small branches of fir tree. As you can see in this photo some of the slices of orange stayed in the oven too long so they are rather burnished! We have decided that they will bring a lovely range of tones to our natural garland!

We have also been making quite a few nests and, as per the previous posts, many many vintage paper baubles to send off to our lovely customers. Our last orders have now been posted and so we are excited to begin decorating our home with our favourite old Christmas decorations hanging on the tree and a good sprinkling of tiny fairy lights and candles throughout our rooms. I can almost smell the scent of the pine tree! 

Hoping you are also enjoying creating your festive home this Christmas. 


Wednesday, 26 August 2020

Happy customers make happy makers!

Recently we have been reminded of the pleasure we get from our lovely customers who send us images of their "two in a teacup" purchases. Although we only post on Instagram intermittently and our handmade products are labour intensive to create so that we only have a small production rate, we love making them and are so, so pleased when they are enjoyed by our customers too. 

We sent a tiny nest, some vintage paper baubles and gift tags to the mainland a little while ago and we were touched to see this lovely photo of our wares so delightfully displayed when they were unpacked.


Wednesday, 22 July 2020

Winter


What a year 2020 is turning out to be! 
Firstly, we hope that you and your family and friends are all staying safe and well. At the start of Winter (June in the Southern Hemisphere) an article I wrote was published in the Black Hen's lovely e-magazine. The article is about how we are supporting each other in our communities during this time of lockdown, isolation and social distancing and this is the link if you are keen to read it. 
http://www.theblackhen.com/the-black-hen-magazine The whole magazine makes for some great reading and is full of creative ideas and wonderful recipes, images and stories.


During June and July we have been busy making our vintage paper covered eggs and have begun creating a range of nests ready for Spring. As you know we love re-purposing old books and so we have also started making our vintage paper baubles. It is early for us to be thinking about Christmas at this stage of the year but this is turning out to be such an extraordinary year, so engaging in the making process seems to be a really positive thing to do.We hope that you too have some creative projects underway. Stay safe and well.


Thursday, 23 April 2020

Paper Egg Tutorial - 1


Hi everyone,
I have taken a series of photos of each stage in making a 3D paper egg and I will try to explain the process so that the images make sense. Please let me know if it is too hard to understand and I will attempt to make a little video showing the process and upload it here. I took the photos at night so I apologise for their colouration! I definitely need to up-skill in the technology sphere!!

To start an egg you need to select thin paper as it is easier to cut through at the end. I used an old dictionary so something similar is good to work with or even tissue paper sheets.You will also need a ruler, stanley knife, glue stick, needle and thread or thin twine, a piece of card or thick paper to cut out an oval shape stencil and an awl or sharp thick needle to pierce through the glued sheets of paper at the end. A cutting mat is also useful.

 You will need at least 30 - 35 sheets depending on how fluted you     want the final egg to be. One dictionary page can be cut in half for   the size egg I made. (see image) I used 32 sheets glued together and the block was big enough to cut out two egg templates that could be joined together to make one egg or perhaps two simpler eggs. Keeping it to 30-35 sheets makes it manageable to cut through for the egg shape so that the two halves can then be put together to form one full egg. If your paper is very thin, like tissue paper, you could glue more layers together and it will still be easy to cut through.
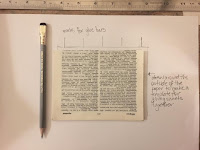
          
On a plain sheet of paper begin by drawing around the paper you are making the egg from. This gives you a marker for placement. Then mark the template with a line down the middle and just in from the edge (approximately a centimetre) on either side. These are my red marks in the photo below. Then make a line in the middle of either side - see my green marks on the image three below. All these markers indicate where you will run the glue down.


Now the process of gluing the sheets of paper begins. Start by running a glue line down the two red outside marks and down the centre line and lay a sheet of paper directly on top smoothing over the glued lines. Next glue down the two green marker lines and place another piece of paper on top making sure it is stuck to the one below. Continue this process alternating the green and then red glue lines until all sheets of paper glued together.


When all the sheets are together, cut a half oval shape out of folded card or paper. This is the template of the egg shape. You can check that it is a pleasing oval shape by opening it out.  It should be as long as the glued block of paper so that when the half egg shape is cut out the end glued lines are not right on the edge. (See image)


Next line the template along the edge of the glued paper block and draw around the shape. Note - I was able to fit two template shapes onto my paper block.


Using a sharp stanley knife carefully cut around the drawn template shape(s).


If you are joining the two cut shapes together for a fuller egg check which glue lines you need to make by looking at the last ones on each half then press the two halves together. If you have used a thinner paper and do not need to glue the two sides together you are up to the next step.


Now you are ready to pierce two holes just in from the corner on each side. You can see how the sharp point has gone through to the other side on the right and the spot for the left hole is marked with a dot. Make sure these holes are clear all the way through and hold the paper together tightly so it doesn't move or slip while you pierce it.


The next step is to thread a needle with cotton and thread it through each ends and tying it off loosely leaving about a little finger thickness loop from the hole. The thread loop needs to be loose enough to allow the paper to open out to form the egg. If it is too tight the egg wont have enough room to curl around to form the 3D shape.


Now you are ready to reveal the egg! Take both sides and open it out. I usually tuck the cotton ends into the egg before I glue both sides together but if you wish to hang it you can use the ends of the knot to do this.


This last image shows both sides being pulled together after the last lines of glue have been applied. Check which lines will continue the pattern before closing the egg - and there you have it!!


Do let me know if you are able to follow these instructions or if you need any further help. Have fun making your eggs and of course this technique also looks wonderful if you change the shape - circle, tree, bell, diamond!

Good luck. xx


Sunday, 19 April 2020

Paper Egg Tutorial

Just to let you know that I haven't forgotten about the instructions to make the paper eggs recently shown on our Instagram account. We will be posting them here in a couple of days - so keep checking in! See you soon.